
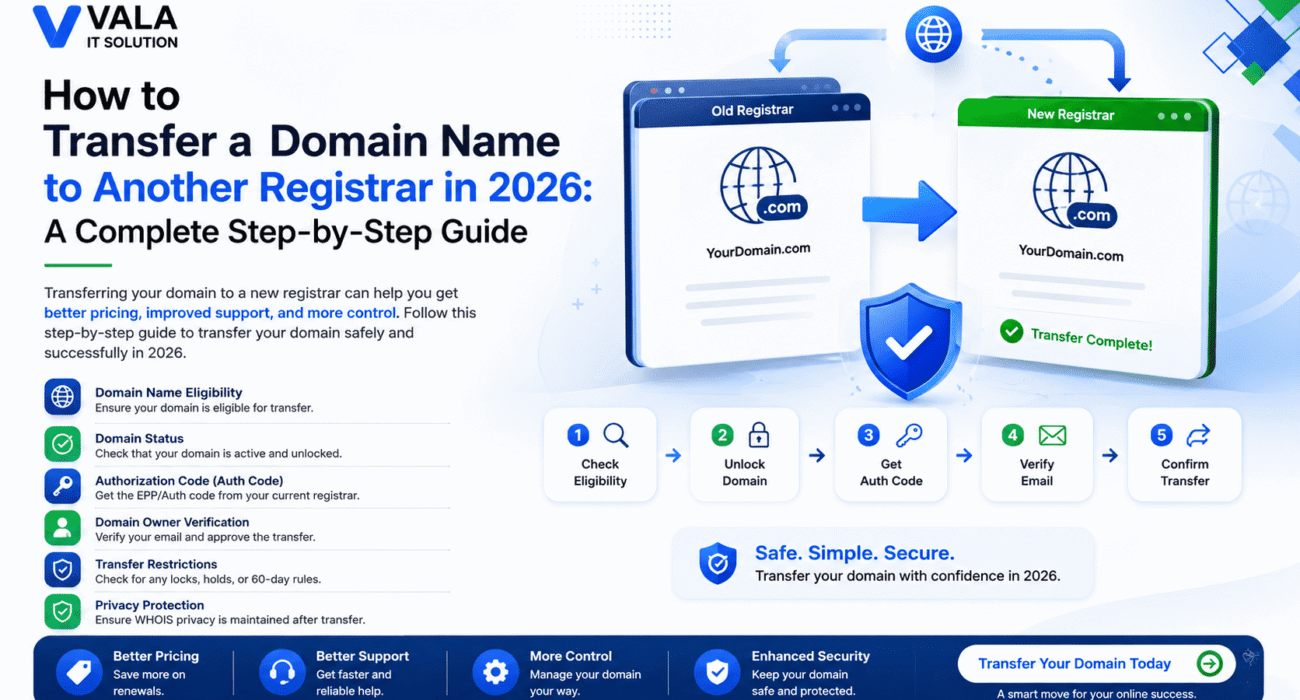
Transferring a domain name from one registrar to another is a common process for businesses and website owners looking for better pricing, improved customer support, enhanced security features, or easier domain management.
Whether you’re moving your domain to consolidate services or switching to a registrar that better suits your needs, understanding the transfer process helps ensure a smooth migration without affecting your website or email services.
In this guide, we’ll explain the domain transfer requirements, the step-by-step process, what transfers with your domain, and what you need to prepare before making the move.
Why Transfer a Domain?
There are many reasons businesses choose to move their domain to a new registrar.
Common reasons include:
- Lower renewal costs
- Better customer support
- Improved security features
- Easier domain management
- Consolidating multiple domains
- Better DNS management
- Advanced domain protection services
- Bundling domains with hosting or business email
A domain transfer changes only the company managing your domain registration—it does not move your website or hosting automatically.
Domain Transfer Requirements
Before initiating a transfer, make sure your domain meets the following requirements.
1. Confirm Domain Eligibility
Not every domain can be transferred immediately.
Generally, your domain must:
- Be actively registered
- Not be expired
- Meet your domain extension’s transfer policies
- Be eligible under ICANN regulations
Most generic domains (.com, .net, .org, etc.) follow similar transfer rules.
2. Unlock Your Domain
Most registrars protect domains by enabling a Domain Lock (also called Registrar Lock).
Before transferring:
- Log into your current registrar
- Disable the domain lock
- Save your changes
Your domain status should change from Locked to Unlocked.
3. Obtain the Authorization (EPP) Code
You’ll need an Authorization Code, also known as:
- EPP Code
- Auth Code
- Transfer Key
This unique code confirms you’re the legitimate owner and authorizes the transfer.
Your current registrar usually provides it through the domain management dashboard or via email.
4. Verify Your Contact Information
Ensure your domain registration details are accurate.
Pay particular attention to:
- Registrant name
- Administrative contact
- Email address
Transfer approval emails are often sent to the registered email address.
If the contact information is outdated, update it before starting the transfer.
5. Check for Transfer Restrictions
ICANN regulations impose certain restrictions on domain transfers.
For example, transfers are generally not allowed if the domain has:
- Been registered within the last 60 days
- Been transferred to another registrar within the last 60 days
- Recently changed ownership (depending on registrar policies)
If any of these conditions apply, you may need to wait before transferring.
6. Disable WHOIS Privacy (If Required)
Some registrars may require temporary disabling of WHOIS privacy or domain privacy protection during verification.
Although many modern registrars support secure transfers with privacy enabled, it’s worth checking your provider’s specific requirements before starting the process.
Step-by-Step Domain Transfer Process
Step 1: Prepare Your Domain
Before initiating the transfer:
- Unlock the domain
- Obtain the EPP code
- Verify your contact details
- Confirm eligibility
Preparing these items in advance helps avoid delays.
Step 2: Start the Transfer with Your New Registrar
Log into the registrar you want to transfer your domain to.
Enter:
- Your domain name
- The Authorization (EPP) Code
You’ll also pay the transfer fee, which typically includes a one-year renewal for eligible domains.
Step 3: Verify Domain Ownership
Your new registrar may ask you to verify ownership.
Verification usually involves:
- Email confirmation
- Account authentication
- Security verification
Complete this step promptly to prevent delays.
Step 4: Approve the Transfer
After verification, your new registrar submits the transfer request.
Your current registrar will usually send an email asking whether you approve the transfer.
Approving the request often speeds up the process.
Step 5: Transfer Processing
Once approved, the domain registry processes the transfer.
Most transfers are completed within:
5–7 days
Some transfers finish sooner if the losing registrar approves them immediately.
Step 6: Confirm Completion
After the transfer finishes:
- Your domain appears in your new registrar account.
- Registration details are updated.
- Domain management is transferred successfully.
Verify that all settings are working correctly before considering the process complete.
What Transfers with Your Domain?
When transferring a domain, the following typically move to the new registrar:
- Domain registration
- Domain ownership
- Expiration date (plus an additional one-year renewal for most eligible domains)
- Domain management
The transfer changes only the registrar responsible for managing your domain registration.
What Does NOT Transfer?
A domain transfer does not automatically move every associated service.
Website Hosting
Your hosting remains with your existing hosting provider unless you separately migrate your website.
Business Email
Email services such as:
- Google Workspace
- Microsoft 365
- Zoho Mail
continue operating independently, provided your DNS records remain correctly configured.
DNS Records
Some registrars allow DNS settings to transfer, while others require manual recreation.
You should always back up important DNS records, including:
- A Records
- CNAME Records
- MX Records
- TXT Records
- SPF
- DKIM
- DMARC
If you’re using services like Cloudflare, DNS management may remain unchanged depending on your configuration.
SSL Certificates
SSL certificates usually remain associated with your hosting server—not the domain registrar.
Verify that your SSL configuration continues working after the transfer.
Tips for a Smooth Domain Transfer
To minimize downtime and avoid issues:
- Back up all DNS records before starting.
- Avoid making website or DNS changes during the transfer.
- Keep your website hosting active until the transfer is complete.
- Monitor email services throughout the process.
- Confirm domain renewal dates after completion.
- Enable Domain Lock again once the transfer is finished.
- Activate Multi-Factor Authentication (MFA) for your registrar account.
Planning ahead helps ensure uninterrupted website and email services.
Common Domain Transfer Mistakes
Avoid these common errors:
- Starting the transfer before unlocking the domain.
- Entering an incorrect Authorization Code.
- Using an outdated administrative email address.
- Forgetting to back up DNS records.
- Attempting to transfer a newly registered domain.
- Cancelling hosting before confirming the transfer is complete.
These mistakes can delay or even prevent a successful transfer.
Final Thoughts
Transferring a domain name is generally a straightforward process when you understand the requirements and prepare in advance. By ensuring your domain is eligible, unlocking it, obtaining the Authorization (EPP) Code, and verifying your contact information, you can complete the transfer smoothly with minimal disruption.
Remember that a domain transfer affects only the management of your domain registration—it does not automatically move your website, hosting, email, or DNS services. Reviewing these settings after the transfer is essential to keep everything running seamlessly.
At Vala IT Solution, we assist businesses with domain registration, domain transfers, DNS management, website migration, business email setup, SSL configuration, and complete website management. Whether you’re moving a single domain or managing a complex business migration, our team can ensure a secure, hassle-free transfer from start to finish.